Adventures in TeX–Part 1
I was looking around for something cheap / free to learn to play with (because the arduino is in an out-phase right now, as it has slightly confounded me, logistically, at the moment) while I save up for my VM host, NAS, and podcasting equipment.
I’m going to start this series as a bit of a learning guide, a how-to, for TeX (pronounced Tech, like technology) and how to create documents with the Typesetting format. I first heard about TeX (and its markup language, LaTex) in college, where engineering folks were using it for mathematical equations. TeX is used to really math-out the spacing and layout for a document. I am interested in learning this, so I’m going to explore this markup, and log my learning here.
How to begin
First, foremost, you need an editor. The cool thing about TeX is that it was developed starting in the 1970’s. Work started in 1978, and the first version was made for a PDP-10 computer at Stanford. That’s old. Ancient, in computing history. The result of this is that there are TeX editors for nearly every computing platform that has ever existed, and a lot of computer platforms that NO LONGER exist. If you have an older computer that you’d like to make use of, for a single purpose writing machine (Like, I don’t know, perhaps a clamshell G3 iBook? Maybe? Anyone? No?), odds are you can make it happen.
For most of my examples and personal-education, I’m going to be using TeXStudio for Windows, or MacTeX, depending on where I am. The syntax is the same. You can download a TeX client here.
In my first example, here, we’re going to create a brief story, just to get some things established.
Documentclass
In the very first line of your document, you need to declare to which type of document you’re creating, and options that can affect the whole document These are the big ones:
- article – Used for scientific journals, presentations, short reports, program documentation, invitations, etc.
- proc – Proceedings, based on the article class
- minimal – As the name suggests, minimal formatting. Base font and page size.
- report – Longer reports, containing chapters. Small books, thesis, etc.
- book – Real books
- slides – Slides, as the name would suggest. Large, san serif letters.
- letter – For writing letters (duh)
- beamer – for Presentations (there is a lot to talk about here).
The syntax we are going to use is
documentclass[options]{class}
Next up, we have to define anything we’d like to include in the document.
The one package that we should always include is
usepackage[english]{babel}
Other packages can be included later, if we need them, but we’re just going to use text right now.
Next up, we’re going to declare our title. The syntax here is
After that, we’re going to declare our author (you, silly) usingtitle{Title of my document}
**author{Jesse Wolcott}**
(We’re almost ready to write, I promise!). Next up, we’re going to begin our document using the following to start our document, and print the title.
After this, we are ready to go. Name your section like so:begin{document}
maketitle
section{Introduction}
Now, just press enter and start typing. At the end of your document, type the following to close it all up.
end{document}
So, you’re document should look like this:
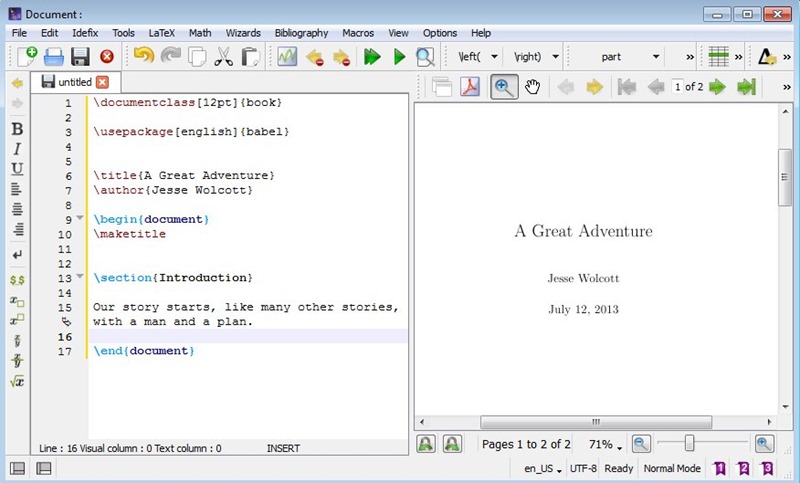
Press Build and View (F6 on windows), and check it out. You made a LaTeX document!